Photography Tips & Guides
Family Photography Guide: Poses, Outfits, Locations & Click
family photography poses, what to wear for family photos, family photo locations, family photoshoot tips, family session guide
PixoProof11 min read
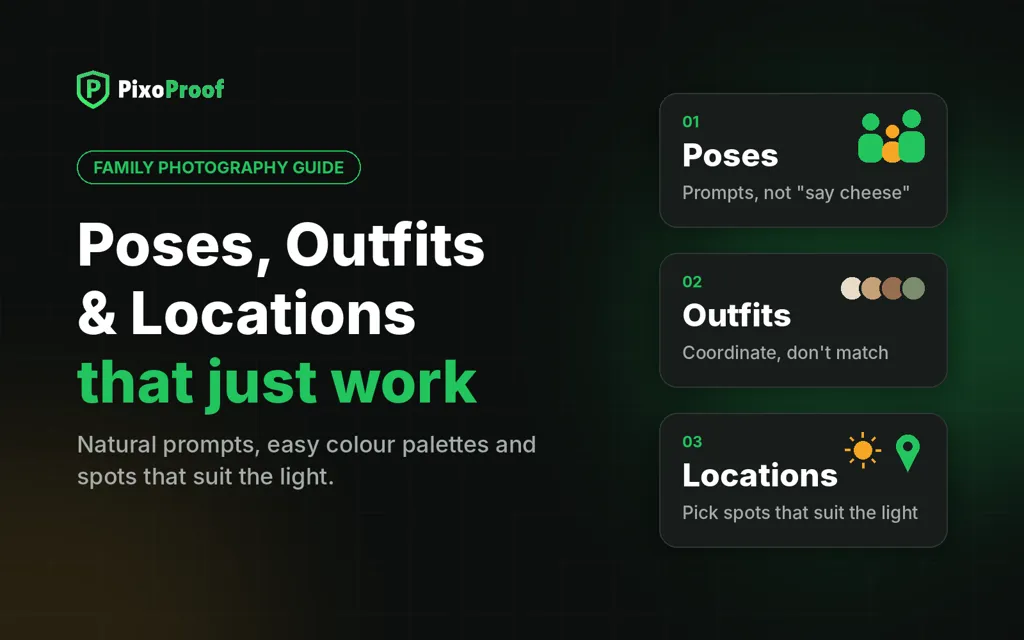
Great family photos are decided long before you press the shutter. The location sets the light, the outfits set the mood, and the poses set how connected everyone looks. Get those three right and the session almost runs itself, even with a toddler who has decided today is not the day.
This guide covers the three things every family asks about, and the ones photographers get asked to fix afterwards:
Where to shoot: how to pick a location that suits the family, the season and the light.
What to wear: a simple colour and fabric formula you can send to every client.
How to pose: 25+ natural poses for couples with a baby, young kids, teens and big extended groups.
It finishes with how to run the session hour itself, and how to turn a great session into a gallery that sells.
Quick version: shoot in open shade or the last hour before sunset, dress the family in 2–3 coordinating muted colours with no big logos, and pose them close together, then give them something to do instead of something to hold still for.
How to choose a family photography location
The best location is one where the family relaxes and the light is soft. A stunning view means nothing if the kids are cold, bored or squinting into the sun.
Start with the family, not the backdrop
Ask three questions before you suggest anywhere:
How old are the kids? Toddlers need space to roam and a short walk from the car. Teens care more about a place that doesn't feel cringe.
What's the story? A family that lives at the beach, a farm they grew up on, or their own living room on a Sunday morning all mean more than a generic park.
Is anyone mobility-limited? Grandparents, prams and wheelchairs rule out steep trails, sand dunes and long stairs.
Family photo location types compared
Park or botanic garden: best for toddlers, big groups and easy first sessions. Watch for crowds and permit rules. Shoot in the last 90 minutes before sunset.
Beach: best for relaxed, playful sessions and coastal families. Watch for wind, midday glare and sandy babies. Shoot at golden hour or on overcast days.
Open field or meadow: best for long grass, running and a soft natural look. Watch for ticks, hay fever and no shade. Shoot backlit at golden hour.
Forest or bush trail: best for a moody, layered, private feel. Watch for dark canopy light and uneven paths. Shoot mid-afternoon or on an overcast day.
Urban street or laneway: best for teens and stylish city families. Watch for traffic, busy backgrounds and hard shadows. Shoot early morning or at blue hour.
The family's home (lifestyle): best for newborns, little kids and real-life storytelling. Watch for small rooms, low light and clutter. Shoot late morning near large windows.
Studio: best for babies, winter months and clean modern portraits. Build in play so it doesn't feel stiff. Any time works.
A meaningful place: a farm, holiday house or grandparents' garden. Check access and permission, and scout the light at session time first.
Light matters more than the view
Golden hour (roughly the hour before sunset) gives warm, flattering light and soft shadows. It's the default for outdoor family sessions.
Open shade, such as the shadow side of a building or a tree line, gives even light at any time of day. Keep the background brighter than the family to avoid a grey, flat look.
Overcast days are a gift: the cloud is a giant softbox. Don't reschedule for grey skies, only for rain.
Avoid midday sun in the open. It causes squinting, panda-eye shadows and blown-out skin.
Location checklist before you book
Visit at the same time of day as the session, or check the sun with an app
Check whether a photography permit or fee is needed
Find 3–4 spots within a short walk so you can vary backgrounds
Note toilets, parking and a shaded spot for breaks
Have a wet-weather backup, even if it's the family's lounge room
What to wear for family photos
Outfits are the question families stress about most, and the one that most changes how the final gallery looks. The rule is simple: coordinate, don't match.
The 3-colour formula
Pick one palette of 2–3 main colours plus a neutral, and let each person wear a different mix of them. Matching white shirts and jeans look dated. A shared palette looks considered and timeless.
Warm earth: rust, mustard, cream and tan. Perfect for autumn, fields and golden hour.
Soft neutral: oatmeal, ivory, sage and light denim. Perfect for beaches, homes and bright studios.
Coastal: dusty blue, white, sand and soft navy. Perfect for beaches and coastal walks.
Forest: olive, cream, chocolate brown and burgundy. Perfect for bush trails, winter and gardens.
Rich and moody: navy, plum, charcoal and a mustard accent. Perfect for city streets, evenings and winter.
Start with one hero outfit
Pick one person's outfit first, often a flowing dress or a patterned shirt with some movement. Build everyone else's outfit around her colours. It's the fastest way to make a family look coordinated without effort.
Fabrics and fit
Choose texture: knits, linen, cotton, lace and soft denim add depth in photos.
Add movement: dresses and skirts that twirl make playful shots easier.
Layer: a cardigan, jacket or hat gives two looks for the price of one.
Fit matters: clothes that are too big hide shape; too tight shows every crease when sitting.
Shoes count: they show up in full-length shots. Clean, simple, and no bright trainers.
What to avoid
Large logos, slogans and characters
Neon or very saturated colours, which cast colour onto skin
Small busy patterns, stripes and checks that flicker on camera
All-black or all-white for the whole family, which loses detail
Brand-new shoes that hurt on a walk
Send a wardrobe guide
Don't leave outfits to chance. Send every family a short guide 1–2 weeks before the session with your palette suggestions, a few example photos and the avoid list. Families love it, and it cuts last-minute "what should we wear?" messages.
Family photography poses that look natural
The best family poses barely look posed. Use a simple base position to get everyone close, then add a prompt or an action so the expressions are real.
Posing foundations
Close the gaps. If there's air between people, it reads as distance. Ask everyone to squish in until it feels too close. On camera, it looks right.
Build triangles. Stagger head heights so faces form triangles, not a straight line. Have someone sit, kneel or hold a child.
Give hands a job. A hand on a shoulder, around a waist, holding a little hand or in a pocket. Floating hands look stiff.
Angle bodies. Turn shoulders slightly towards the centre of the group rather than square to the camera.
Chin forward and down. A tiny lean of the face towards the camera removes double chins and looks more engaged.
Shoot the in-between. The laugh after the pose is often the frame they'll print.
Classic poses for every session
The tight cuddle. Everyone stands close with arms around each other, kids in front or held. Your safe opener.
Seated cluster. Parents sit on a blanket or step, kids on laps or leaning in. Great for wiggly toddlers.
Walking together. Hold hands and walk slowly towards you, talking to each other. Shoot from the front and behind.
Swing between parents. A one-two-three swing for little ones. Instant real laughter.
Forehead kisses. A parent kisses a child's forehead while the child looks at the camera or giggles.
Whisper secrets. Ask a child to whisper something silly in a parent's ear and watch the reaction.
Lying in the grass. Everyone lies down in a circle with heads together; shoot from above.
Shoulder ride. A child on a parent's shoulders while the other parent looks up laughing.
Poses for couples with a baby
Baby in the middle. Parents face each other, foreheads close, baby held between them.
Lifting baby up. One parent lifts baby overhead while the other looks on.
Tummy time. Baby lies on a blanket, parents lie on either side facing in.
Over the shoulder. Baby rests on a parent's shoulder facing the camera; the other parent kisses baby's cheek.
Poses with toddlers and young kids
The big hug race. Parents kneel with arms open; kids run in for a hug from a few metres away.
Spin and twirl. A parent spins a child around, or a child twirls in a dress.
Tickle attack. Parents tickle the kids on the count of three.
Piggyback line. Each parent piggybacks a child, walking side by side.
Peekaboo. A parent hides behind a tree or a hat and pops out.
Poses with teens
Casual lean. Teens lean on a wall or railing with parents, hands in pockets. Relaxed, not cute.
Walk and talk. Ask the family to walk and talk about a favourite holiday.
Side-by-side sit. Everyone sits on a step at different heights, shoulders touching.
Parent and teen pairs. Split into pairs for one-on-one portraits; teens often relax away from younger siblings.
Poses for extended families and big groups
Tiered group. Grandparents seated in the middle, adults standing behind, kids in front.
Generations line. Grandparent, parent and child side by side or stacked hands.
Family branches. Photograph each household separately, then the whole group.
Group walk. Everyone walks towards the camera together. Easier than holding twelve people still.
Grandkids pile-on. All grandchildren cuddle around the grandparents.
How to run a family photo session
A family session is part photography, part entertainment. Plan the flow so you get the must-have shots while everyone still has energy.
Plan the order
Warm up (5 minutes). Chat, play, let the kids explore while you shoot candids from a distance.
Whole-family shots first (10 minutes). Get the hero group photo while everyone is fresh and clean.
Small groups and pairs (15 minutes). Siblings, each parent with each child, the couple alone.
Individual portraits (10 minutes). One child at a time while the others play nearby.
Play and movement to finish (10 minutes). Running, swinging, tickling. This is where the best laughs happen.
Most family sessions work best at 45–60 minutes. After that, little ones fade fast.
Prompts beat poses
Instead of "smile", give the family something to do or feel:
"Give Mum the biggest squeeze you can."
"Whisper your favourite food in Dad's ear."
"Everyone look at the youngest and laugh at the same time."
"Walk to me and bump hips every third step."
"Parents, nose to nose. Kids, tell them it's gross."
Adjust the words for each family. The goal is real reactions, not fake smiles.
Working with young kids
Get on their level. Kneel down; you're less scary and the angle is better.
Let them warm up. A shy toddler often joins in after 10 minutes of being ignored.
Bring a tiny bribe plan. Agree on it with parents first: bubbles, a toy on your lens, or a treat at the end.
Ask parents to relax. Kids mirror stressed parents. Tell them "Whatever happens, we'll get beautiful photos" before you start.
Never force a pose. A child crying on Dad's shoulder can still be a lovely, honest photo.
Before the session: a quick prep message
Send the family a short reminder 2–3 days out with:
Location pin, parking and meeting spot
Arrival time, and a note to arrive 10 minutes early
A reminder of their colour palette
Snacks, wipes and a spare top for little ones
Your wet-weather plan and how you'll let them know
After the session: from great photos to a gallery that sells
The session is only half the job. How you deliver the photos decides whether the family buys one package or several extra images, prints and an album.
Send proofs quickly. A sneak peek within 48 hours keeps the excitement high. A full proofing gallery within 1–2 weeks is ideal.
Let the family choose. A proofing gallery where they can favourite and submit their selection beats a long email thread about "the one near the tree".
Protect what they haven't bought. Watermarked previews and screenshot protection stop unpaid images ending up on Facebook as cropped screenshots.
Make it easy on a phone. Most parents will open the gallery on their phone at night, after the kids are in bed.
PixoProof was built for exactly this step. Families view their proofs in a free iOS and Android app or a protected web gallery, pick their favourites and submit a selection. You get notified if someone tries to screenshot an image they haven't paid for, which is often the perfect moment to offer it as an add-on.
Try PixoProof free · Read next: How to Price Extra Images So Clients Actually Buy Them
FAQ
What is the best time of day for family photos?
The hour before sunset, often called golden hour, gives the softest and most flattering light. Early morning works well too, especially with babies who are freshest after a morning nap. Avoid the middle of the day in open sun.
How long should a family photo session last?
45–60 minutes is the sweet spot for most families. Families with babies or toddlers often do best with 30–45 minutes; larger extended families may need up to 90.
What colours look best in family photos?
Muted, earthy and neutral tones such as cream, sage, rust, dusty blue and navy photograph beautifully. Pick 2–3 colours for the whole family and avoid neon shades, big logos and busy small patterns.
Should the whole family match?
No. Coordinating looks better than matching. Use a shared colour palette, but give each person a different outfit, texture and shade.
How do you get natural smiles from kids?
Skip "say cheese". Use games and prompts instead: tickles, whispers, silly questions, races and swings. The genuine laugh straight after a prompt is usually the best frame.
What if it rains on the day?
Light drizzle and overcast skies can make beautiful, moody photos, so only reschedule for steady rain or strong wind. Agree on a backup date or an indoor plan, such as a lifestyle session at home, when you book.
How many photos should a family receive?
It depends on your packages, but 30–60 edited images from an hour-long session is common. Many photographers show more proofs and let families choose a set number, then offer extra images as add-ons.