Saving Time with Album Presets
PixoProof Academy: PixoProof Album Presets: What They Are and How to Create One
An album preset is a reusable template for new albums. It stores the gallery, gallery design, download, and watermark settings you use for a type of job, plus a default album tag and a list of photo sets. Choose the preset when you create an album and everything is filled in for you.
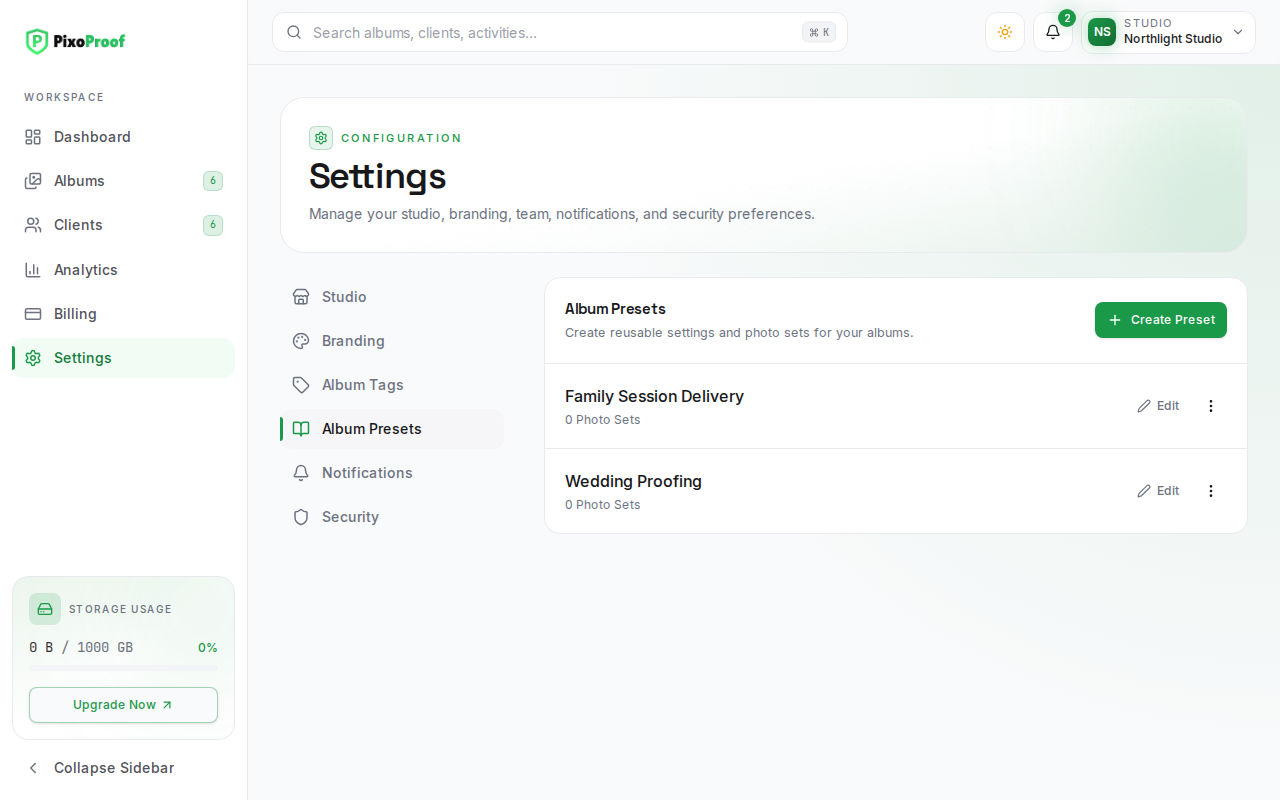
Where to Find Album Presets
- In the left sidebar, click Templates.
- Select the Album presets tab.
Each preset is a card with its name and how many photo sets it contains.
Creating a Preset
- Click New album preset at the top of the page, or the New album preset card at the end of the list.
- In the Create Album Preset window, enter a Preset Name (for example, Wedding Delivery).
- Click Create Preset. You will see "Preset created successfully."
The Edit Album Preset window opens straight away so you can configure the preset.
Starting Values
A new preset starts with these values, which you can change:
- Selection limit: 20, and Reminder days before expiry: 7
- No automatic expiry, with After expiry action set to Hide
- Allow Favorites and Auto hide gallery after submission on; Allow web access and Allow Client Notes off
- Downloads turned off
- Watermark protection on, with Mixed placement, 80% opacity, and every stamp option selected
- The Classic dark gallery design
- One photo set named Gallery
Configuring a Preset
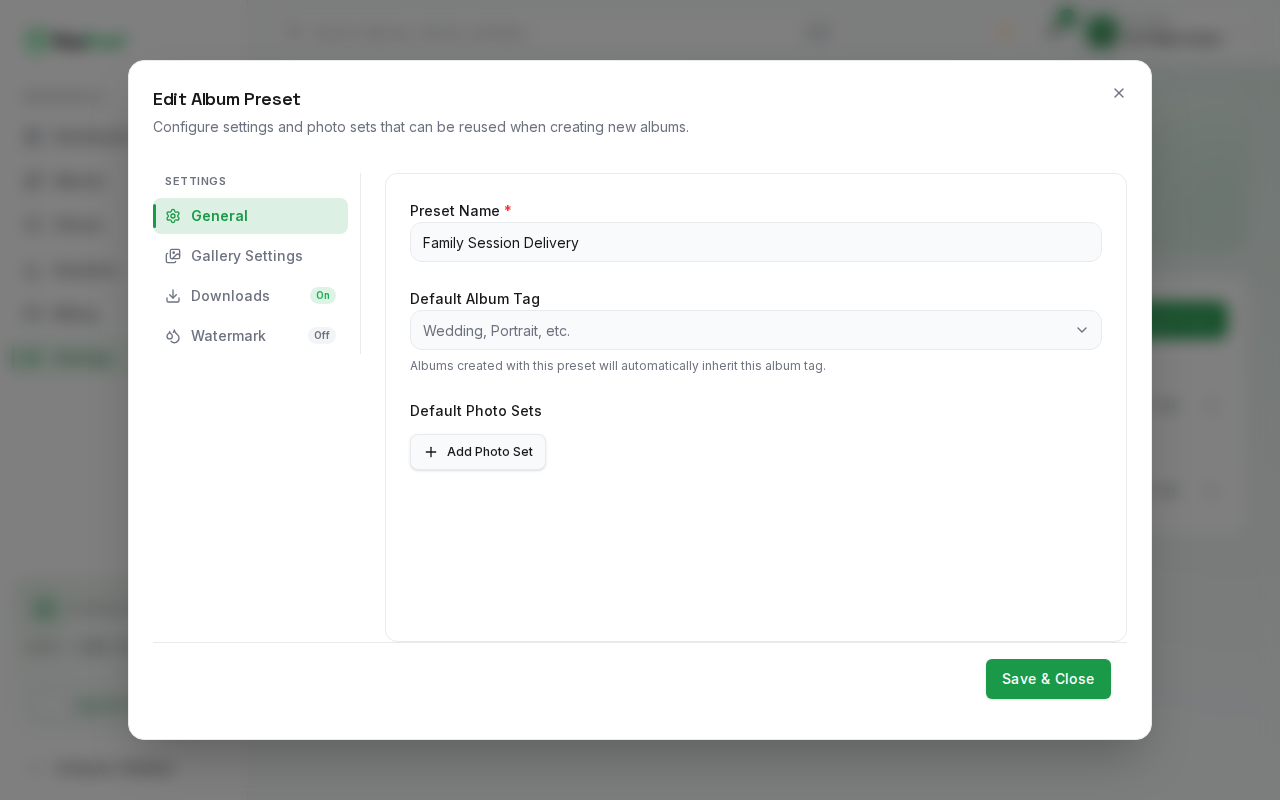
The Edit Album Preset window has five tabs.
General
- Preset Name — the name you pick from when creating an album.
- Default Album Tag — albums created with this preset get this tag automatically. Start typing to search your tags, or type a new name to create one.
- Default Photo Sets — the photo sets (sections) each new album starts with, such as Ceremony or Reception. Click Add Photo Set to add one, and the X next to a set to remove it. A preset always keeps at least one photo set, and every set needs a name.
Gallery Settings
The same options as an album's Gallery Settings, used as defaults for new albums: Selection limit, Reminder days before expiry, After expiry action, Allow web access, Allow Favorites, Allow Client Notes, and Auto hide gallery after submission.
One field is different: instead of a fixed date, presets use Expiry (days after album creation). For example, enter 30 and each album made from the preset expires 30 days after it is created. Leave it empty for "No automatic expiry".
Gallery design
The same design options as an album's Gallery design tab: the look, cover, background and accent colours, and title font, with a live preview. A preset has no cover photo, so the preview shows a placeholder. The design is saved with the preset when you click Save & Close, and albums created from the preset start with it instead of your studio default.
Downloads
The same download options as an album: whether downloads are enabled, Full gallery download, Single photo download, Original Size (High Resolution), and Web Size (Optimized).
Watermark
The same watermark options as an album: watermark protection on or off, Placement (Mixed, Tiled, Center, Corner), Opacity, and the Stamp on each preview options Client name, Client email, Studio name, and Logo image.
For the logo, a preset can use the watermark logo from Settings → Branding, or you can upload a Preset logo (PNG, JPEG, or WebP up to 2 MB) that albums created from this preset will use instead.
Saving
Click Save & Close. You will see "Preset updated successfully."
If you try to close the window with unsaved changes, an Unsaved Changes prompt asks whether to Discard them or Save & Leave.
Using a Preset When Creating an Album
- Start creating a new album as usual.
- In the Album Preset field, choose your preset. Choose None (Default Settings) to skip presets.
- Finish creating the album.
The album is created with the preset's settings, photo sets, and album tag. You can still change any of them later in the album's own settings.
Managing Presets
- Edit — opens the preset in the editor.
- Duplicate — open the ⋮ menu (More options) next to a preset and choose Duplicate to make a copy you can adapt, for example a Wedding Delivery preset with downloads switched on.
- Delete — open the ⋮ menu and choose Delete, then confirm. Albums you already created from the preset are not affected.
Tips
- Create one preset per type of job, such as Proofing (selections on, downloads off) and Final Delivery (downloads on, original size).
- Changes to a preset apply to albums you create afterwards. Existing albums keep the settings they were created with.